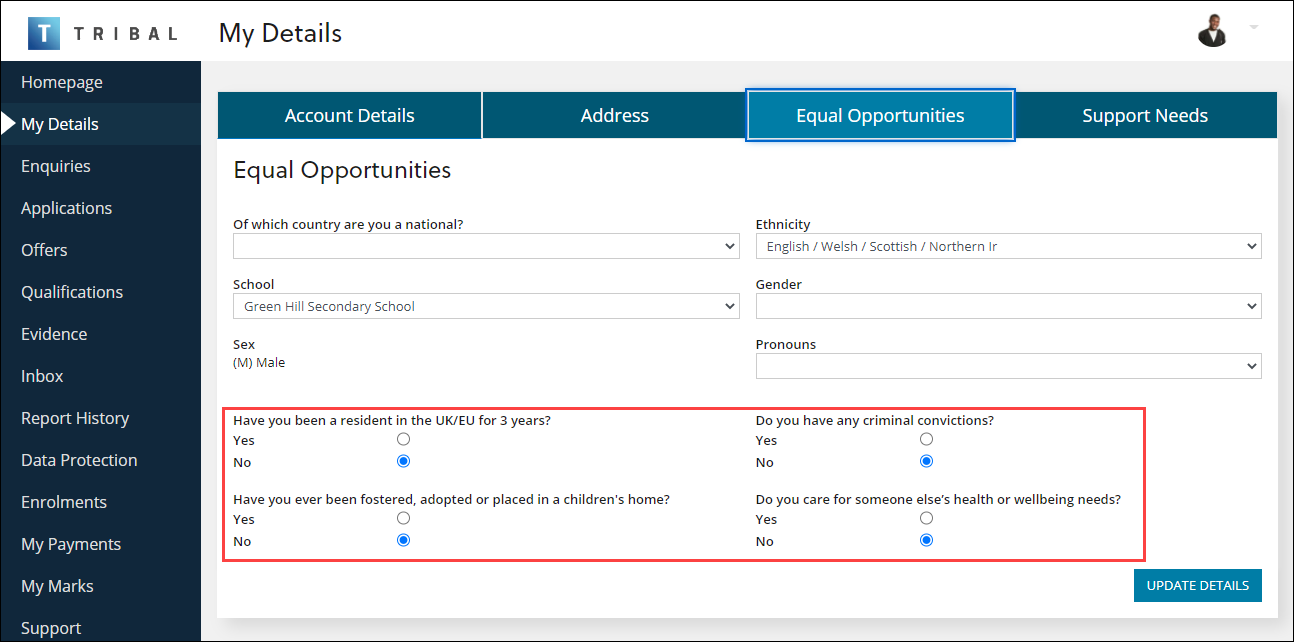
You can configure Ontrack Designer to perform various tasks, including:
You can configure editable fields in Ontrack Designer and match those fields to call the appropriate REST service to update the record for standard controls.
This functionality is controlled by the OntrackWriteback licence for Ontrack Staff Hub and the OntrackProspectWrite licence for Ontrack Learner Hub. If the relevant licence is not enabled, the Service and Web Service Field fields are greyed out on the Control Details and Column Details panes respectively.
To configure write-back fields:
- Copy the required page.
-
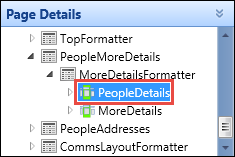
In the Page Details pane, select the relevant standard control.
-
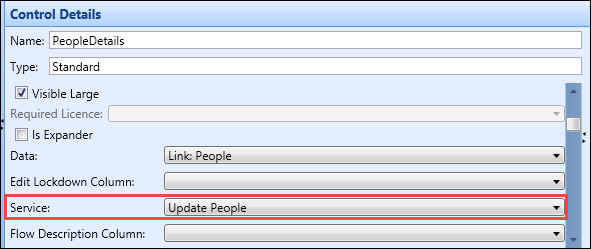
In the Control Details pane, select the required REST service from the list of available services in the Service drop-down field.
-
In the Page Details pane, select the text field you want to configure.
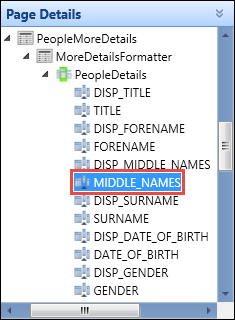
- In the Column Details pane, complete the following fields:
- In the Web Service Field field, select the REST service field from the drop-down list to match with the editable field.
- Select the Editable check box.
- Select the Required check box.
In the Min Length field, enter the minimum number of characters allowed in the field.
The maximum length is limited to the maximum length accepted by the REST service. The Max Length field can be used to restrict it further if necessary.
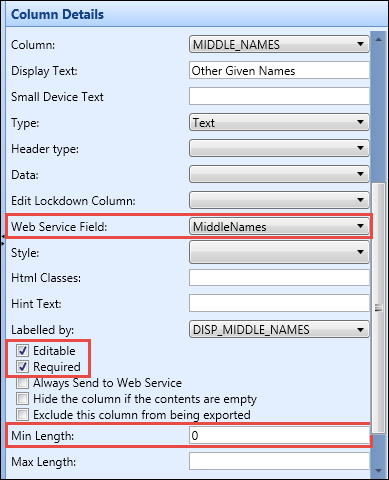
You can also configure invisible fields to send to the REST service that it might require, by deselecting all the visible flags, and selecting the Always Send to Web Service check box.
-
Click Save.
The configured text field can then be edited in Ontrack Staff Hub or Ontrack Learner Hub and any updates to the field will call the appropriate REST service.

You can create pages in Ontrack Designer so staff and learners can create or update or delete custom log records in Ontrack Staff Hub and Ontrack Learner Hub.
To configure a page to create or update or delete custom log records, you can select one of the following new REST services from the Service field in the Control Details pane:
- Create or Update User Table Records
- Delete User Table Records
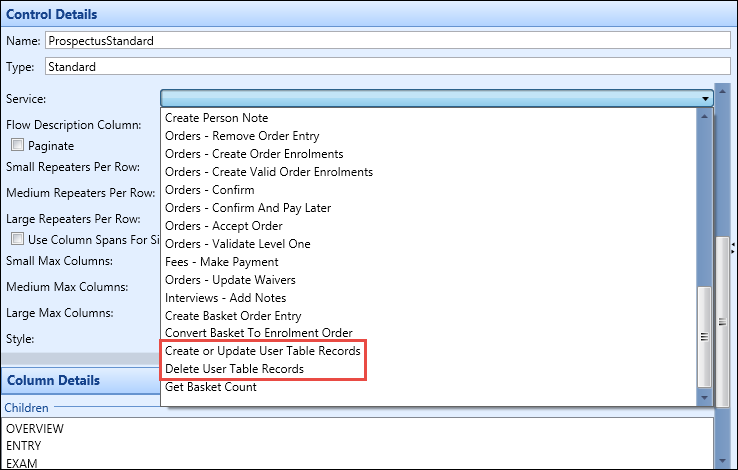
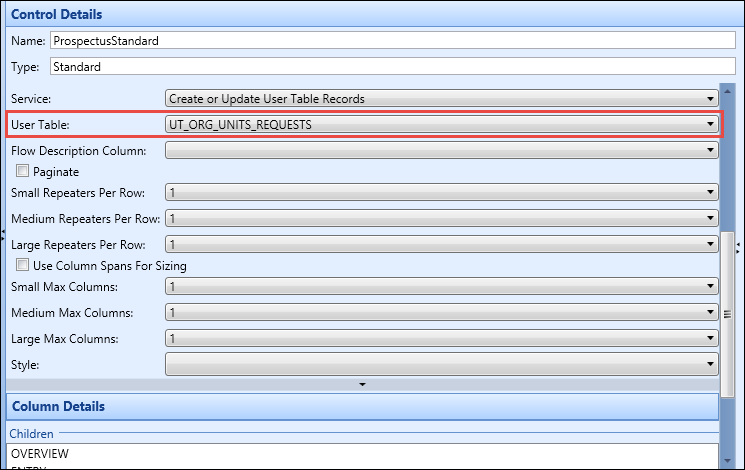
The User Table field is displayed when one of the REST services above is selected, from which users can select the required user table to write-back to.
Custom write-back is restricted to custom log tables only, and it is not possible to write-back directly to other base tables (for example: PEOPLE).
Permissions to use the REST services to manage records for other users requires the associated custom user roles assigned.
A validation message is displayed if there are issues with a user's request to create or update or delete custom log records.
An authenticated user (for example: learner) requires no permissions to create a new record linked to themselves and can edit and/or delete a record they have created.
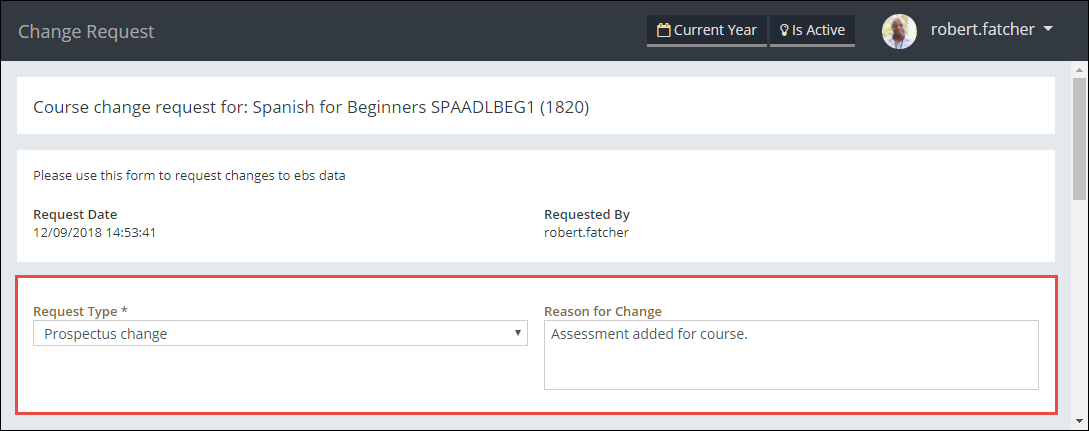
The following example shows a set of screens that have been built upon a user table created for the Organisation Log that is used to capture change requests (that is: to enable staff to request changes to data, rather than change live data directly).
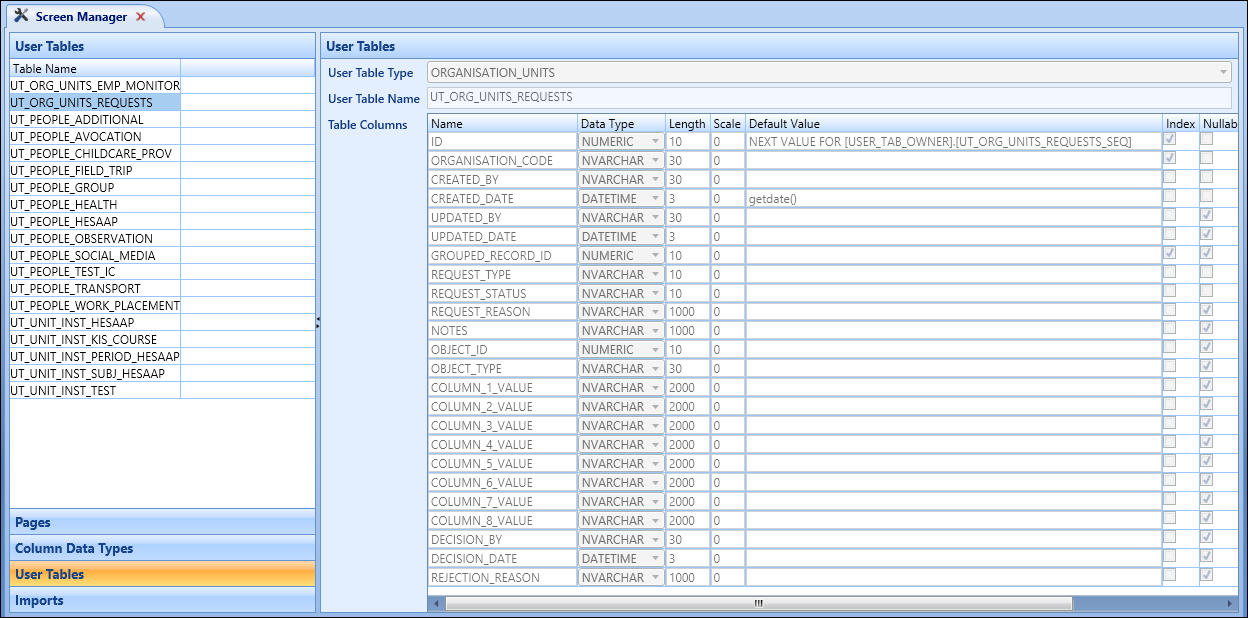
A staff user can request a change to prospectus information on a course in Ontrack Staff Hub.
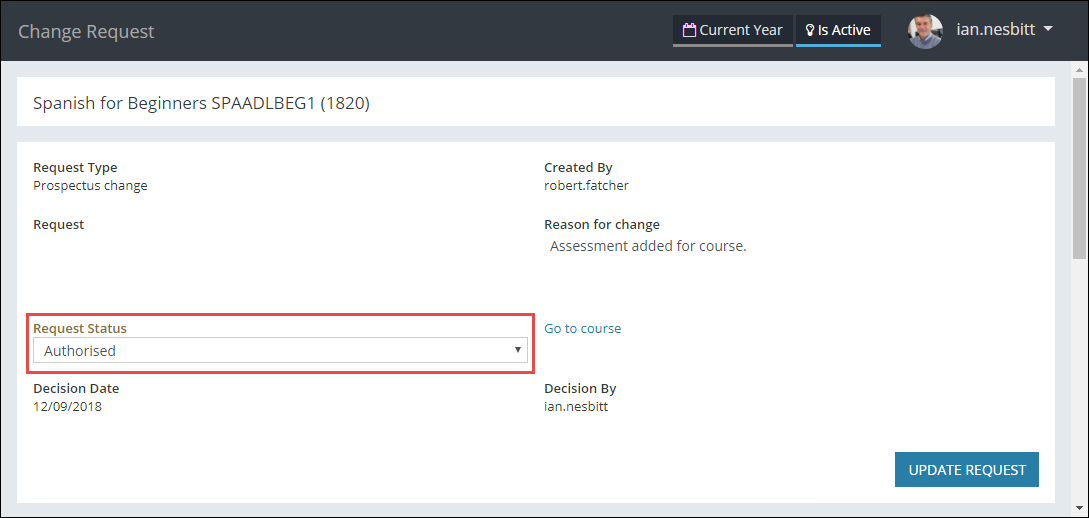
This request can then be viewed by another staff user (for example: senior manager) with the required custom user roles associated, and authorised or rejected as required.
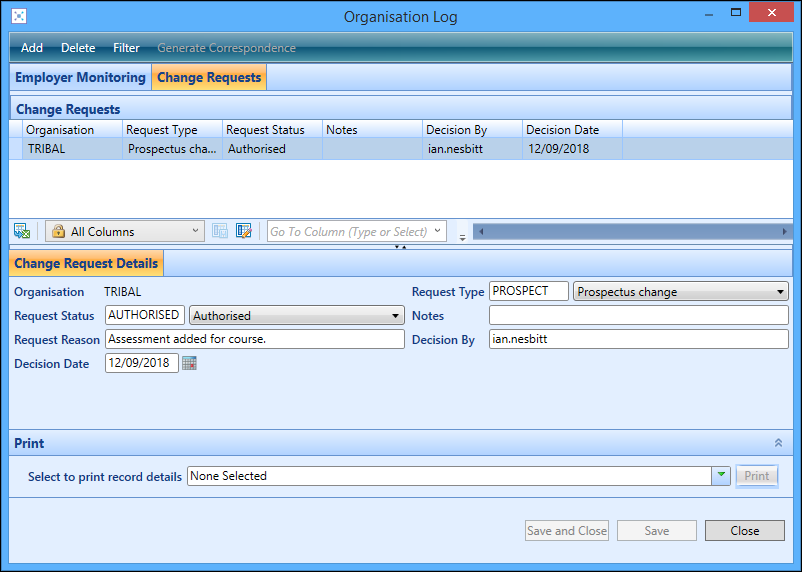
Details of the request and any subsequent changes will update the relevant custom log record in Central.
Refer to Custom Logs for further information on managing custom logs.
You can audit pages that a user visits in Ontrack Staff Hub and Ontrack Learner Hub to assist with data protection compliance.
When a valid OnAccessAudit licence is held, the Audit Access check box is displayed for each page in EBS Ontrack Designer. If the Allow all Ontrack hub/prospect access? institution settings are set to Y, this will set the Audit Access check box to ticked and make it read-only at page level, with the audit information stored in the database whenever a page is visited.
The information stored includes the URL and/or parameter information so that it is possible to identify exactly what page the user looked at, plus any contextual information (for example: if the Learner Details page was visited, the person code of the learner is included in the stored information).

If the Allow all Ontrack hub/prospect access? institution settings are set to N, the Audit Access check box is not selected but can be edited to allow individual page auditing access.

The following validation also applies to the audit data when it is stored:
- The learner export process (accessed from the Learner Export button in the Learner module) includes any audit data
- The de-duplication process transfers any audit data between learner records
- The learner deletion process deletes any associated audit data (that is: existence of this data will not prevent deletion)
You can configure pages to collect information for a record and then submit the data entered (for example: this can be used to write-back to the appropriate Delete REST service to delete a record using a submit button).
To configure pages to be able to submit data:
- Copy the required page.
-
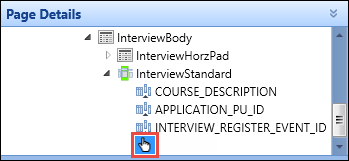
In the Page Details pane, select the required control, and then click the Add Button button on the System Configuration Commands ribbon.

The button is added to the selected control.
- In the Column Details pane, complete the following fields:
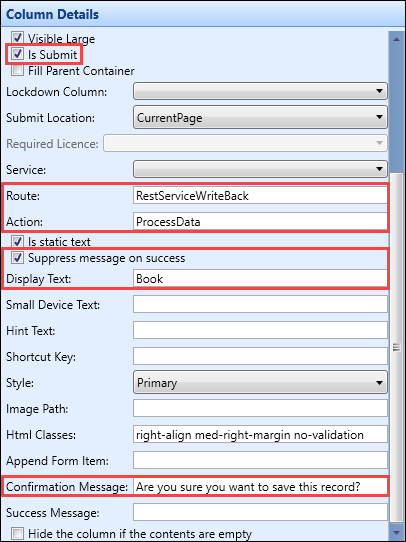
- Select the Is Submit check box.
- In the Route field, enter RestServiceWriteBack.
- In the Action field, enter ProcessData for the page.
- In the Display Text field, enter the required name for the button.
Select the Suppress message on success check box to not display a confirmation message for a submit option after a successful action.
- In the Confirmation Message field, enter the required text for the confirmation message that displays.
-
Click Save.
The information entered on the configured page will be saved on clicking the submit button.
You can configure pages to collect information for a record over multiple pages and then submit the data entered. This configuration is useful to control which fields are displayed for different scenarios (for example: when collecting enrolment information, there may be a different set of fields required for a full-time course compared to a part-time course).
To configure this functionality:
- Copy the required page.
- In the Page Layout Details pane, complete the following fields:
- In the Flow Key field, enter the same value for each page.
- In the Sequence field, enter the required order for each page.

-
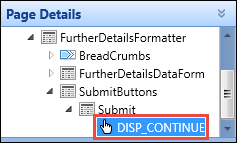
In the Page Details pane, select the button to navigate to the next page.
- In the Column Details pane, complete the following fields:
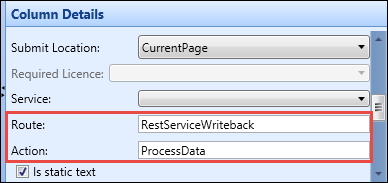
- In the Route field, enter RestServiceWriteBack.
- In the Action field, enter Navigate for each page other than the final page and ProcessData for the final page in the sequence.
-
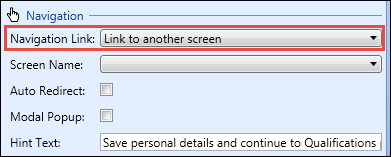
In the Navigation Link field, select Link to another screen from the drop-down list.
-
Click Save.
The information entered on the configured pages will be submitted on completion of the final page.
You can control editable access to data for users (that is: restrict the editing of data to appropriate users) in Ontrack Designer.
The Edit Lockdown Column field is available on the Control Details pane.
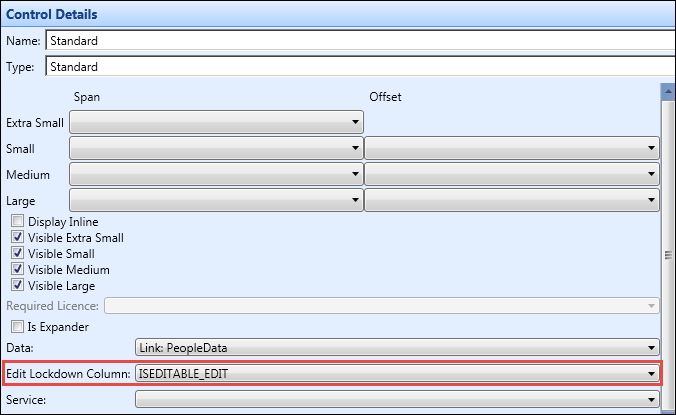
This field is populated by the columns available in the data link specified in the Data field that are prefixed by 'ISEDITABLE_'.
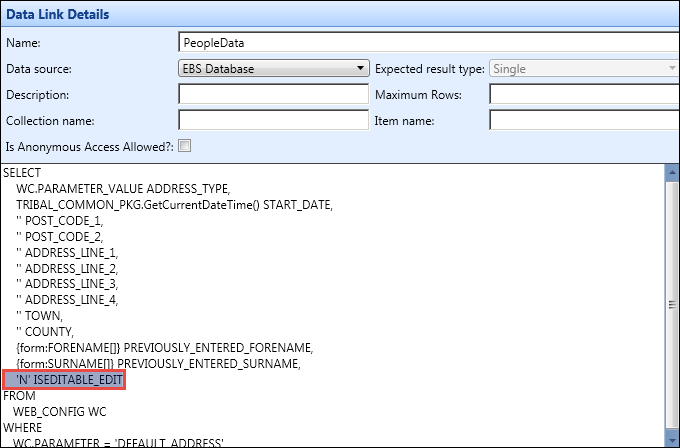
If the data returned in this column is set to N, then the control is read-only in Ontrack Staff Hub or Ontrack Learner Hub. Any other value, including null will make the control editable.
You can also disable editing at row level by linking a grid column to the ISEDITABLE flag (that is: when an editable column has the edit lockdown column set, then the same logic applied by this setting that is used in the standard control is applied to the grid on a row by row basis).
You can embed website analytics tracking code into each page in Ontrack Staff Hub or Ontrack Learner Hub. This will allow users to track website usage and user behaviours using third party tools. For example, Google Analytics or Google Tag Manager.
Note that Google recommends that scripts are embedded in the <head> tag. To support this, the contents of a script named head.cshtml placed in the ~/Views/Analytics folder will be included in the <head> tag of every page in Ontrack. Files with any other name will continue to be included in the <body> tag of each page.
The following web config settings are available so you can change the 'EBS Ontrack' and 'Tribal' logo images on the login page:
- productImageLocation - use to change the 'EBS Ontrack' logo
- organisationImageLocation - use to change the 'Tribal' logo
The '$homepage-background-image' scss variable also allows the default background image to be overridden on the login page.

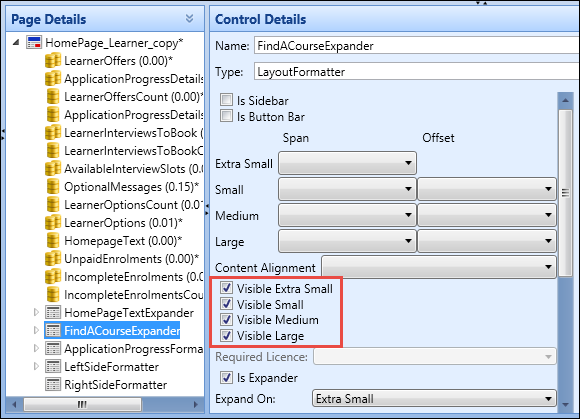
The Find a Course section can be made available on the Homepage in Ontrack Learner Hub so learners can search for a course to find out more details and add courses to their basket where they can enrol (that is: if your institution does not have a prospectus on their website, learners can search for and enrol on courses using this process).
This section is not displayed by default so the visibility needs to be enabled in Ontrack Designer.
You can insert radio buttons into Ontrack software using Ontrack Staff Hub Designer and Ontrack Learner Hub Designer.
To configure a radio button, the following are required:
-
A data link is required to be created on the page which includes the data that you want to select from. Refer to Add data links for further information
-
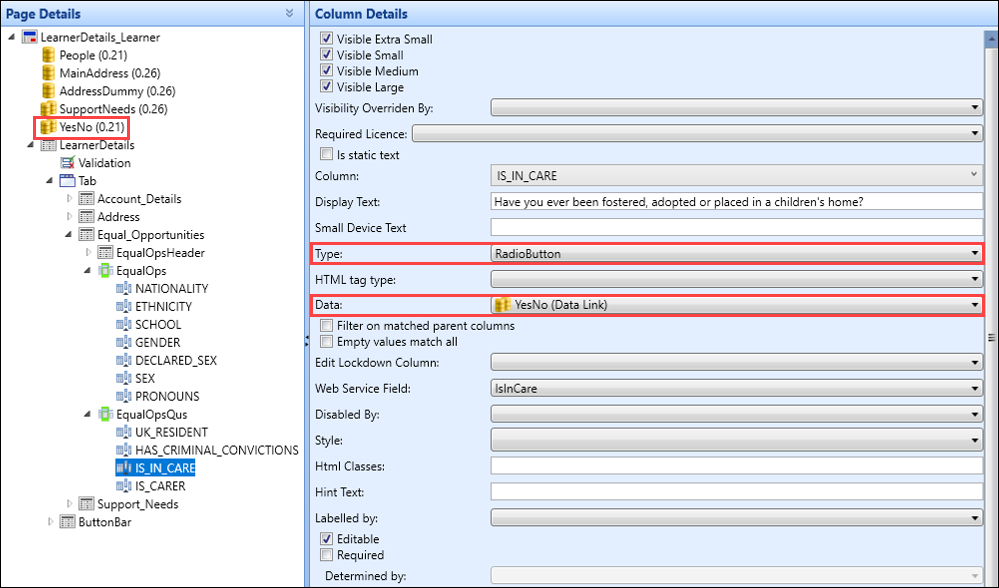
A column with a Data type of the specified data link, and a Type of 'RadioButton' is also required.
The Is Static Text check box must be deselected for the Data field to be displayed.
Any verifiers or any code that generates as a list can be used.
An example datalink for a radio button is displayed in the following image.

An example of the Radio buttons displayed in Ontrack Staff Hub.
